21 Favorite Things Party Ideas
Favorite Things parties turn everyday favorites into a celebration that feels personal, playful, and far more memorable than another basic party theme.
You can build the whole setup around snacks, beauty picks, cozy finds, small gifts, and shared favorites without making the planning feel complicated.
In this article, you’ll find 21 Favorite Things party ideas covering decor, exchanges, food, activities, and thoughtful details worth using.
Let’s jump in!
Sweet Favorite Bites
Dessert works best here when guests can sample several small favorites instead of committing to one oversized slice.
Mini cupcakes, cookies, brownies, and candy cups keep the table varied while making serving quick and mess-free.
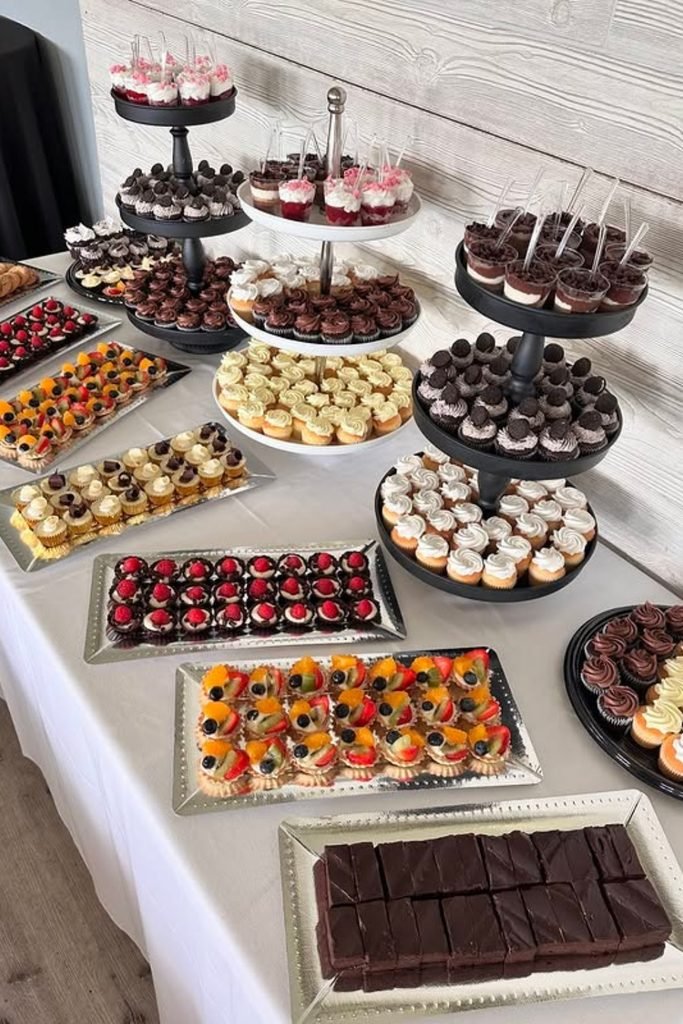
1. Tiered Bites
Build height across your table with tiered stands, then spread cupcakes, brownies, fruit tarts, and smaller bites around the lower platters.
Keep similar flavors together so guests can compare chocolate, vanilla, and fruit options quickly without reaching across crowded sections of the table.
Place colorful fruit pieces between richer chocolate choices, helping the arrangement feel balanced while giving guests plenty of easy grab-and-go options.
2. Mini Layers
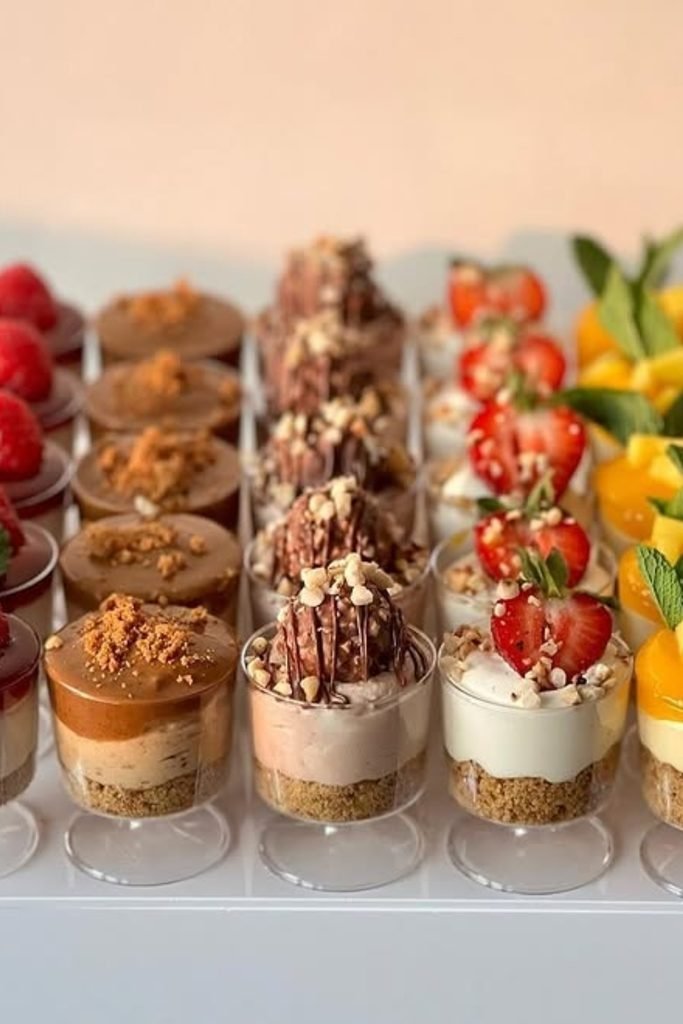
Serve several flavors in individual cups, using biscuit bases and creamy layers to keep portions tidy while still offering plenty of variety.
Switch between raspberry, chocolate, strawberry, and mango toppings so each row brings a different color and flavor to the overall setup.
Finish with mint leaves, chopped nuts, fresh berries, or chocolate drizzle to give every small portion its own polished finishing detail.
Sip Something Fun
A mocktail station gives guests room to mix flavors they already love without turning the drinks table into extra work.
Keep a few juices, sparkling mixers, fruit garnishes, and labeled syrups together so everyone can build a favorite combination quickly.
1. Flavor Bar
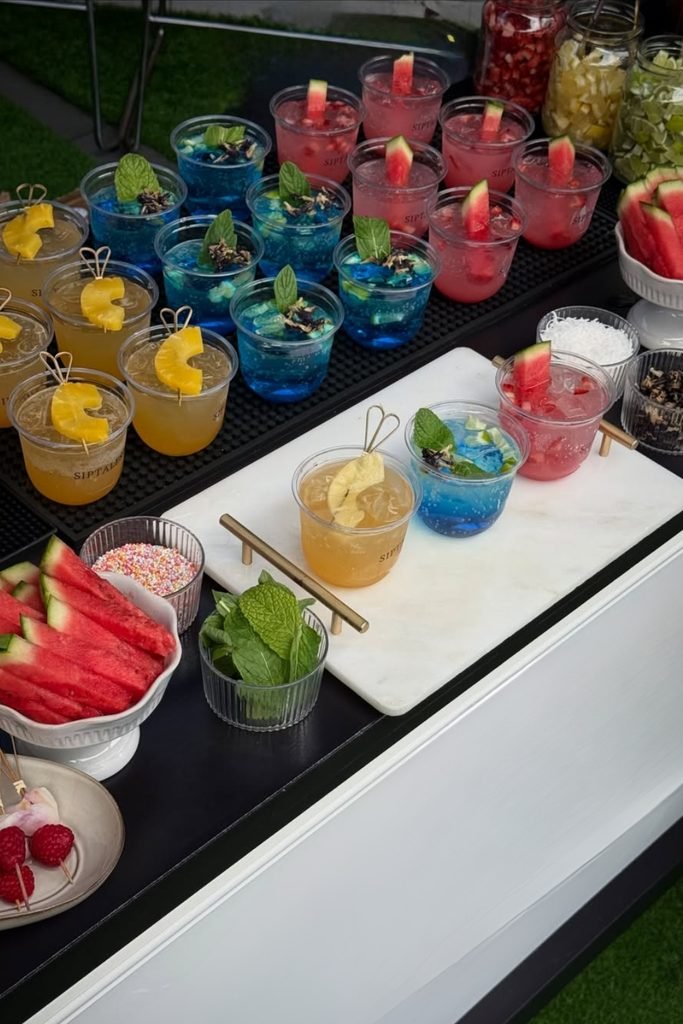
Give guests several colorful drink choices by preparing watermelon, pineapple, and blue mixes ahead, then arranging each flavor in separate rows.
Keep matching fruit garnishes beside each drink so guests can recognize flavors quickly while adding mint or extra toppings whenever they want.
Use clear cups to show off every bright color, making this setup especially fun for outdoor parties, showers, or warm-weather celebrations.
2. Garden Sips
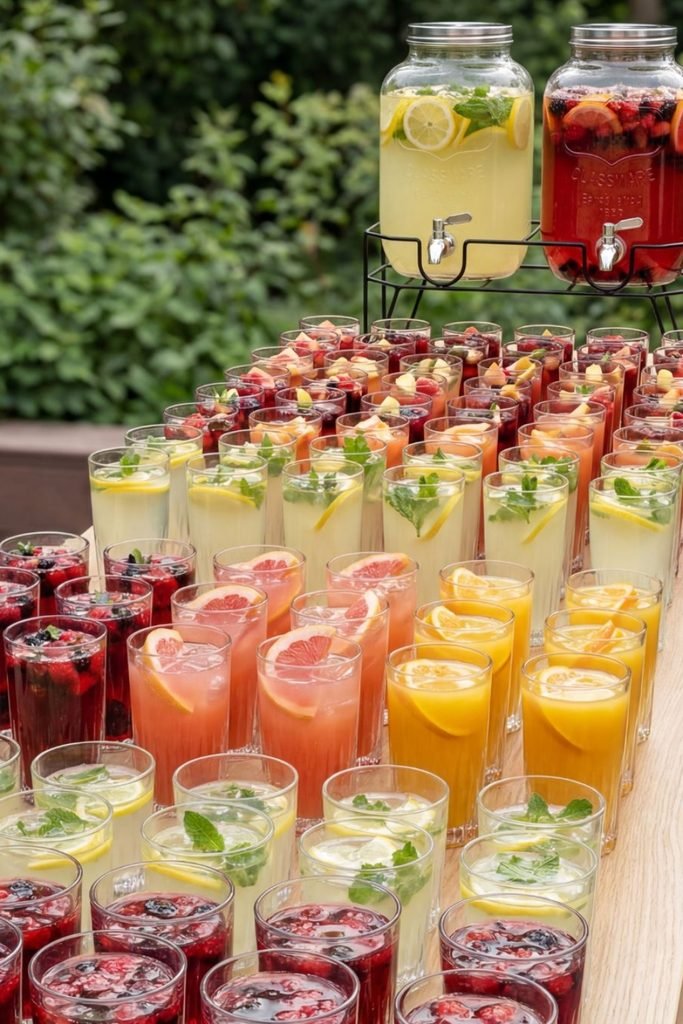
Make outdoor serving easier by filling dispensers with citrus and berry drinks, then pouring matching flavors into glasses before guests start arriving.
Arrange lemon, grapefruit, berry, and mint-filled glasses in sections so everyone can spot their favorite flavor without slowing down the serving area.
Keep the dispensers raised behind the glasses for easy refills, while fresh fruit inside adds color without requiring extra table decorations.
3. Colorful Sips
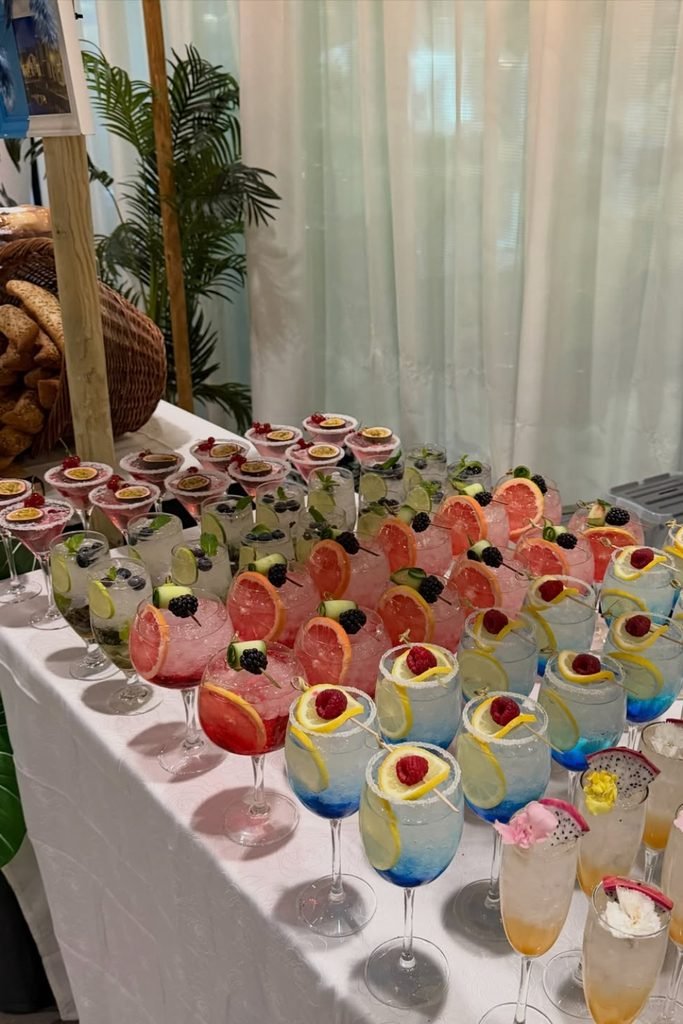
Bring more personality to the table by serving drinks in different glass shapes, with each color getting its own fresh fruit garnish.
Pair grapefruit with blackberries, lemon with raspberries, and lime with blueberries so every glass feels thoughtfully finished without complicated decorating steps.
Set the glasses in neat color groups before guests arrive, creating an organized self-serve display that still feels playful and celebration-ready.
Basket Display Corner
Grouped baskets make the exchange area feel organized while keeping smaller favorites from disappearing across tables or getting mixed together.
Use different basket sizes, simple labels, and open placement so guests can spot each category without digging through crowded piles.
1. Snack Hamper
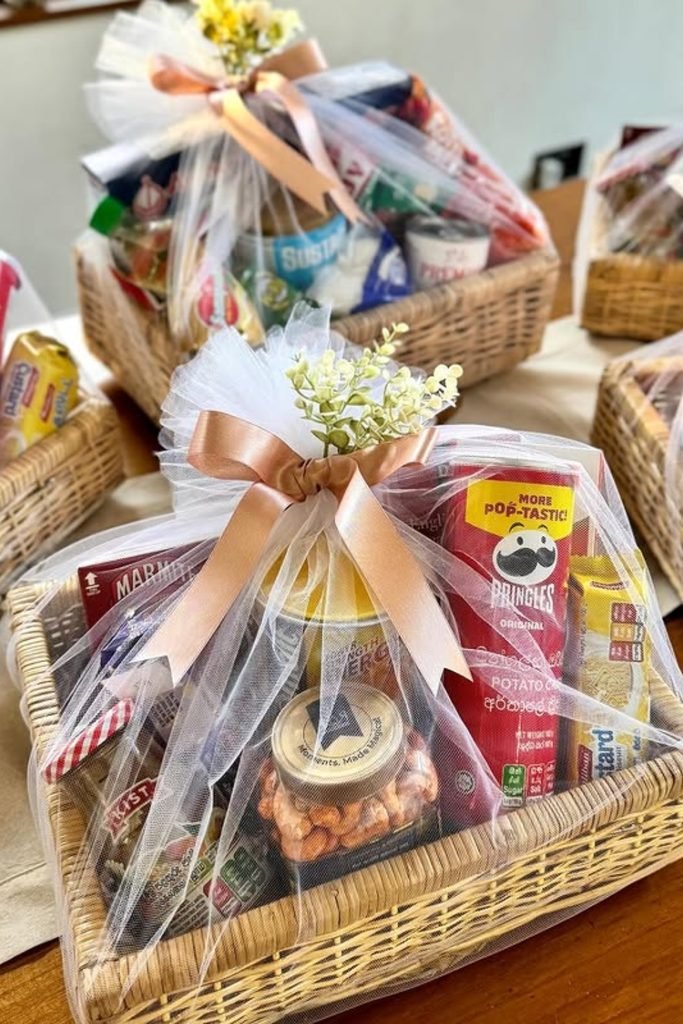
Fill a shallow woven basket with familiar snacks, nuts, crackers, and small packaged favorites so guests receive plenty of easy choices.
Wrap everything in soft mesh and finish the top with ribbon and delicate flowers, giving an everyday snack collection a polished presentation.
Keep heavier packages toward the back and smaller items near the front so every part of the hamper stays visible and balanced.
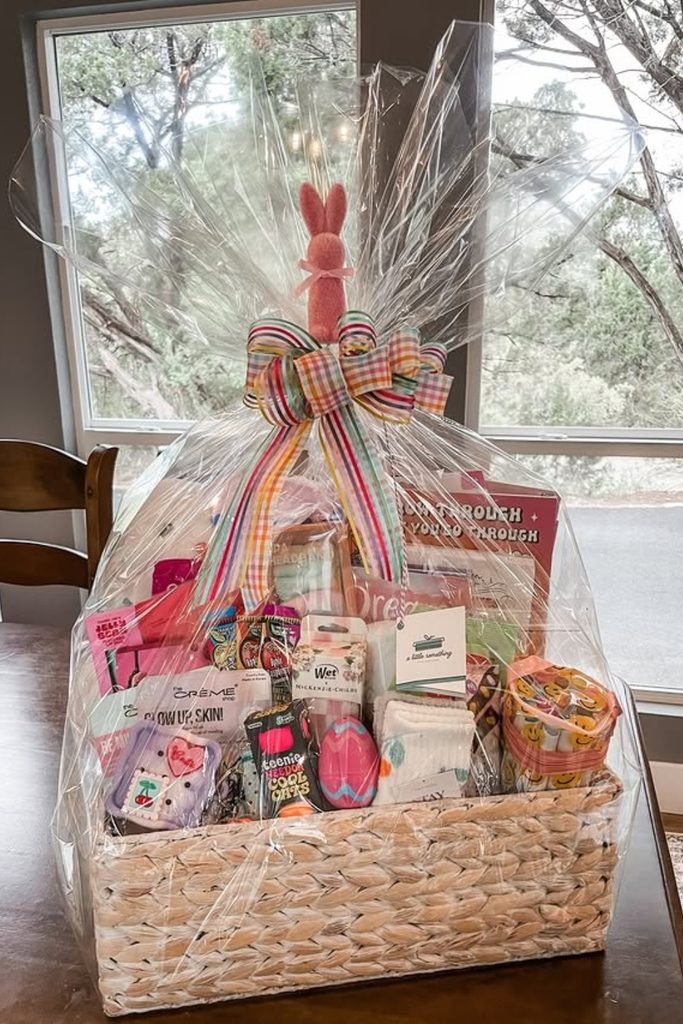
2. Playful Basket
Bring a little fun into gifting by mixing colorful accessories, sweet snacks, small self-care pieces, and practical goodies inside one basket.
Use a taller woven container when you have several items, then layer shorter pieces forward so nothing interesting disappears behind larger packages.
Finish with clear wrapping and a bright patterned bow, letting all those cheerful colors become part of the presentation before opening.
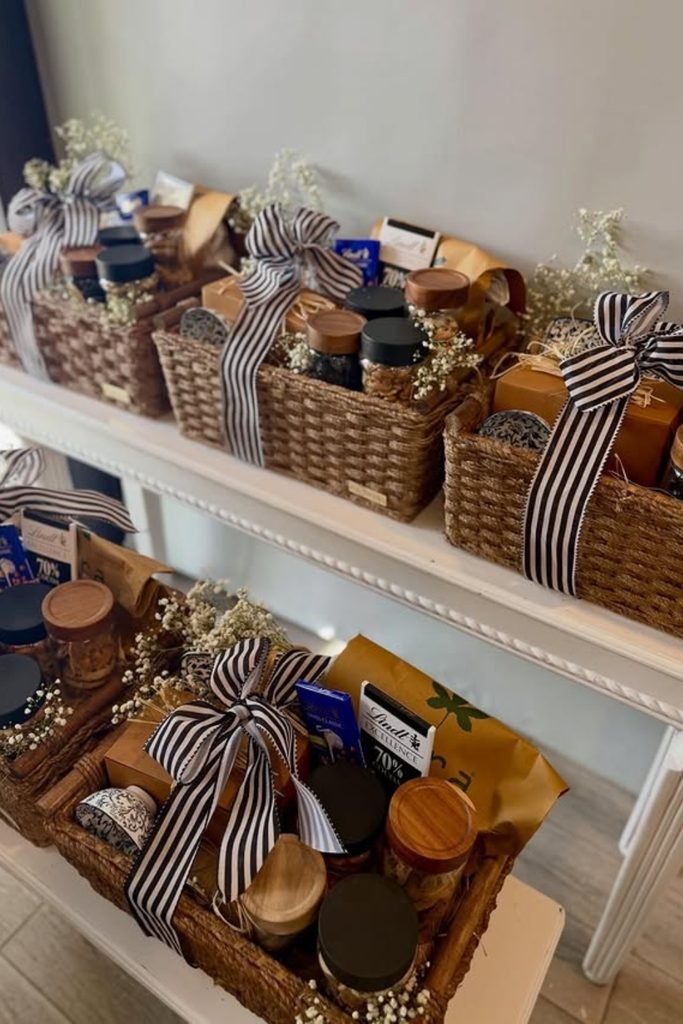
3. Gourmet Hampers
Choose smaller matching baskets when you want individual gifts, then fill each one with chocolates, jars, packaged foods, and thoughtful little extras.
Tie striped ribbon around every basket to create a coordinated finish, especially when several hampers will be displayed together before guests leave.
Tuck delicate dried flowers between products for softness, keeping them near the edges so labels and useful items remain easy to see.
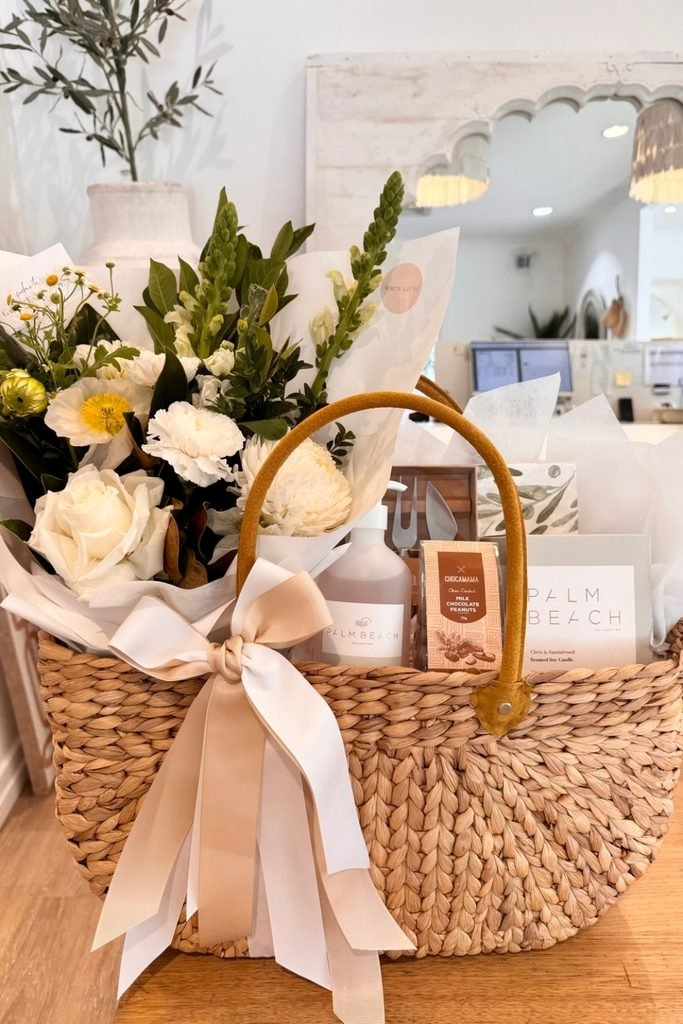
4. Floral Basket
Pair a fresh flower arrangement with candles, chocolates, fragrance, or small home items when you want the gift to feel extra thoughtful.
Choose a structured woven basket with a handle so taller flowers can sit beside boxed products without making the arrangement feel overcrowded.
Finish the front with a wide neutral ribbon, keeping the palette soft so the greenery, white blooms, and carefully chosen gifts stand out.
Color Crush Decor
Favorite colors give the party an easy visual direction, especially when balloons, napkins, candles, and flowers follow the same loose palette.
Stick with two or three shades so the setup feels fun and coordinated without every surface becoming overly matched.
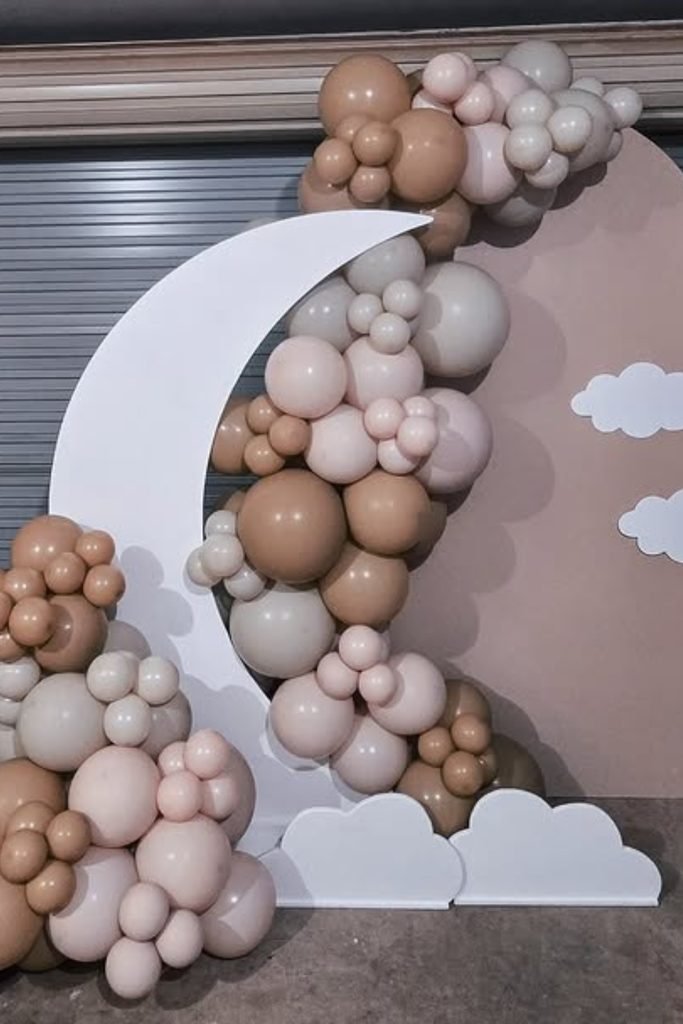
1. Moon Backdrop
Create a dreamy focal point with a large crescent moon, then surround it with balloons in soft beige, blush, and ivory shades.
Layer different balloon sizes around the moon and floor, helping the arrangement feel fuller without making the neutral color palette look too busy.
Add simple cloud cutouts near the base and backdrop, giving you an easy photo area that works beautifully for softer celebration themes.
2. Basket Display
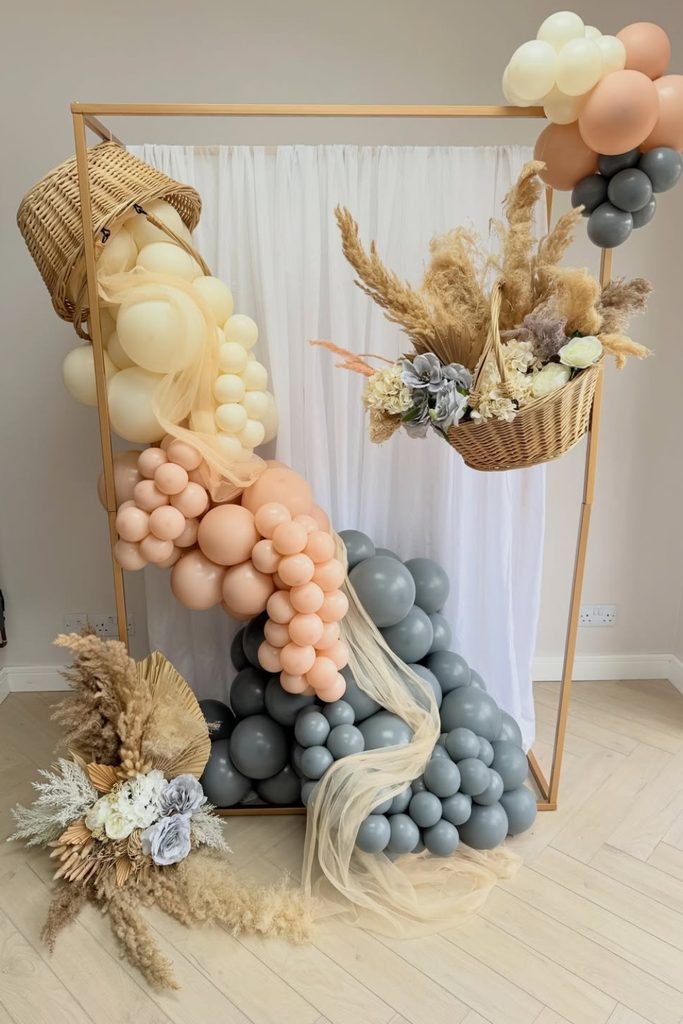
Give a simple frame more character by combining balloon clusters with hanging woven baskets, dried grasses, flowers, and softly draped fabric.
Keep peach and cream balloons through the middle, then anchor the bottom with deeper gray tones for stronger contrast and visual balance.
Let dried arrangements fill the open corners while flowing fabric connects each section, making the whole backdrop feel layered without overcrowding it.
3. Floral Arch
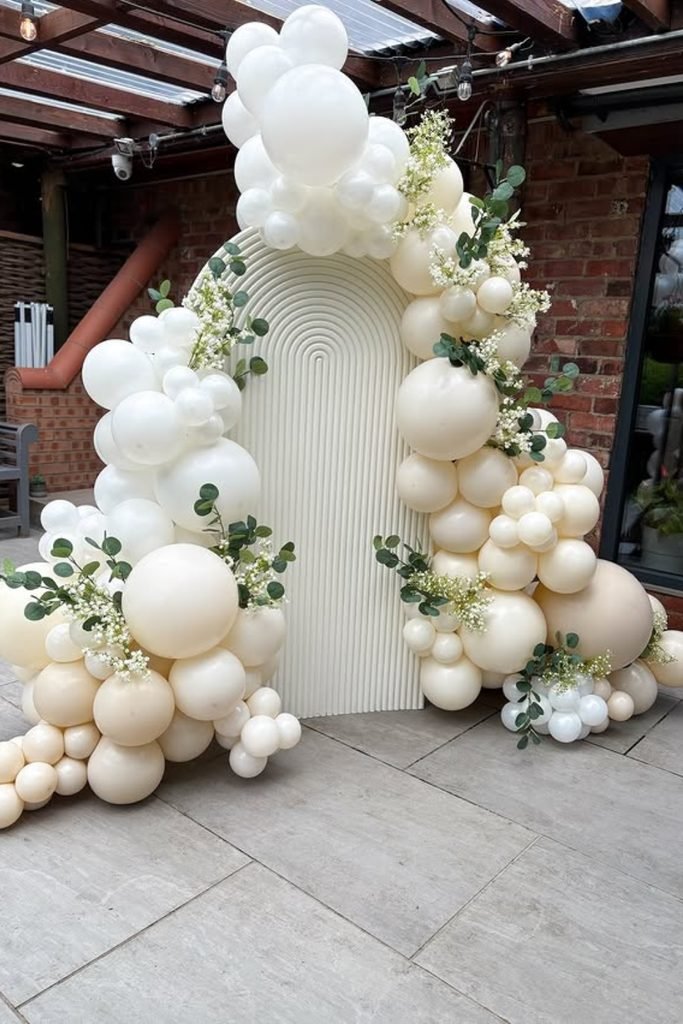
Keep your backdrop elegant with cream and white balloons wrapped around a textured arch, then weave greenery through several sections for softness.
Vary the balloon sizes from tiny clusters to oversized pieces, creating natural movement while keeping the mostly neutral palette clean and coordinated.
Tuck eucalyptus and delicate white flowers between selected balloons, giving an outdoor setup extra texture without covering the beautiful arch behind them.
4. Draped Florals
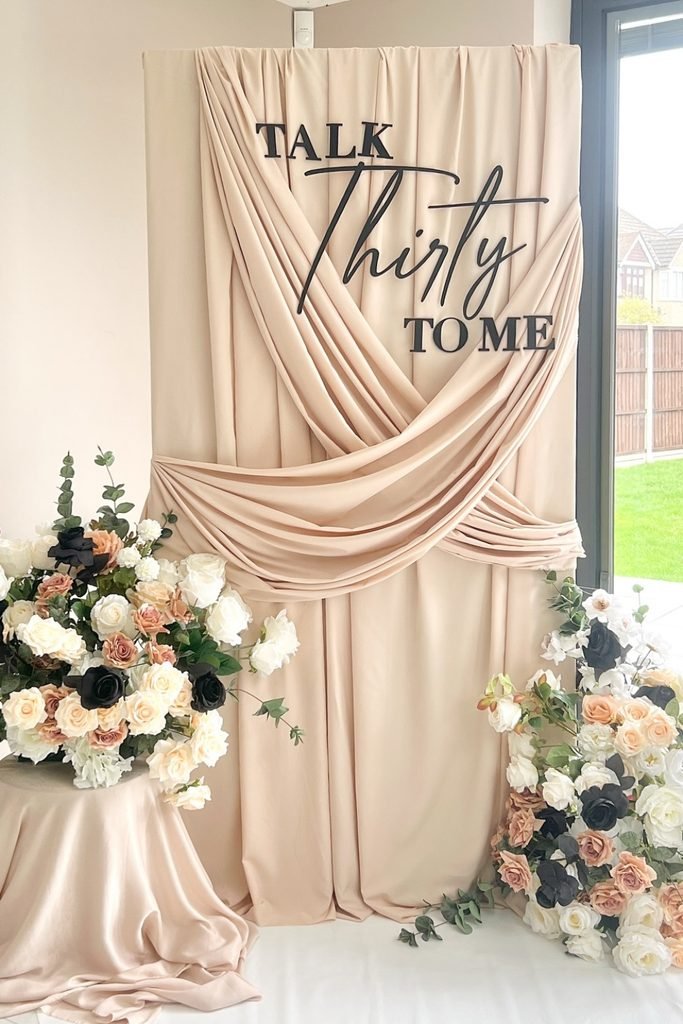
Turn a plain wall into a polished photo spot by layering soft beige fabric in sweeping folds instead of leaving it completely flat.
Frame the lower corners with full arrangements of cream, peach, and black roses, then weave eucalyptus outward for a softer natural shape.
Keep the center mostly open for personalized wording, giving guests a clear photo backdrop while the florals add interest around the edges.
Beauty Pick Bar
Beauty favorites work better when guests can browse a few practical picks instead of sorting through a crowded table of random products.
Group lip balms, hand creams, mini perfumes, and skincare samples by type so choosing something feels quick, simple, and genuinely useful.
1. Spa Table
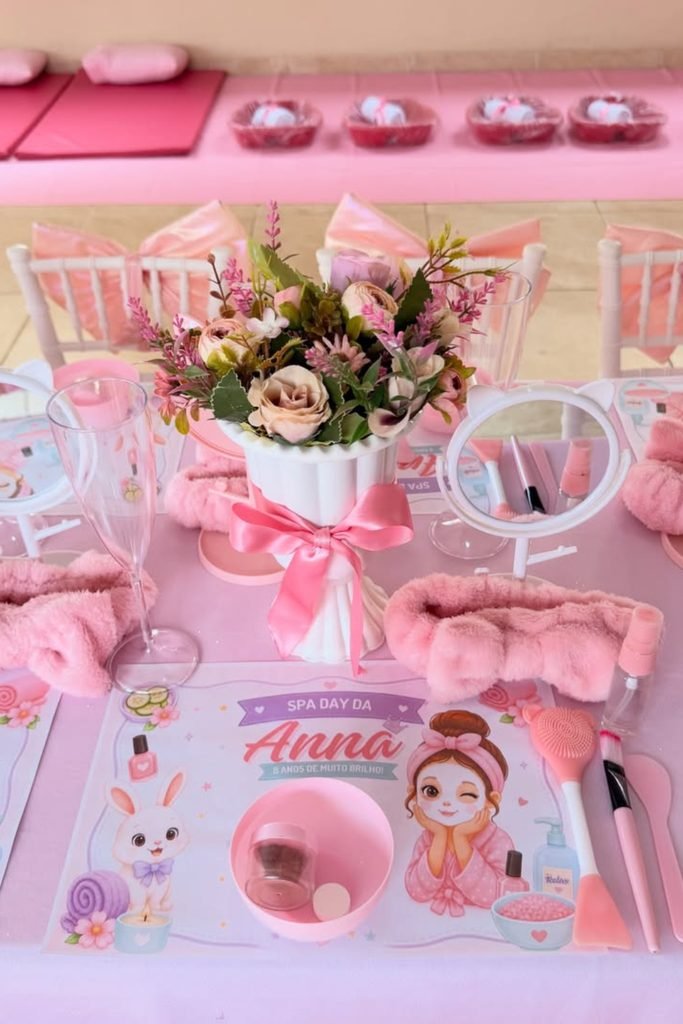
Turn the table into a mini pampering station by giving each guest a mirror, fluffy headband, brush, and small beauty essentials.
Keep everything within easy reach at each place setting, so guests can enjoy the activities together without constantly sharing or passing supplies.
Use pink accessories, chair bows, and a floral centerpiece to carry the playful spa theme across the table without making it feel cluttered.
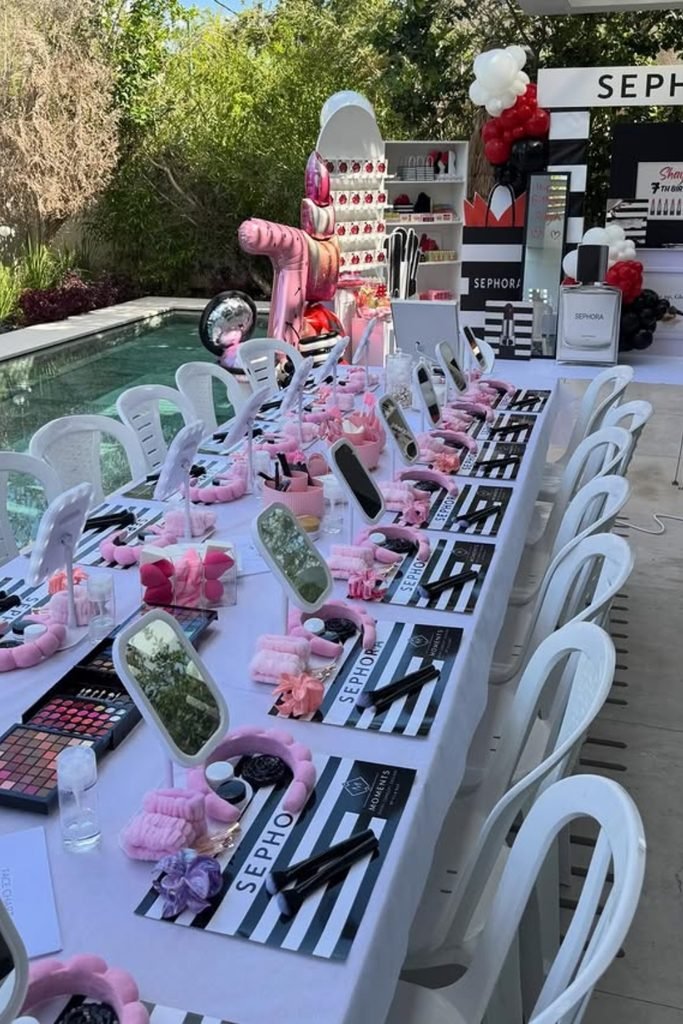
2. Beauty Workshop
Create an interactive beauty experience with individual mirrors, makeup palettes, brushes, headbands, and personalized placemats arranged neatly along one long table.
Give every guest their own working space and supplies, making the activity easier to follow while keeping everyone involved at the same time.
Carry black, white, and pink details into the surrounding display, helping the activity table connect naturally with the larger beauty-inspired party theme.
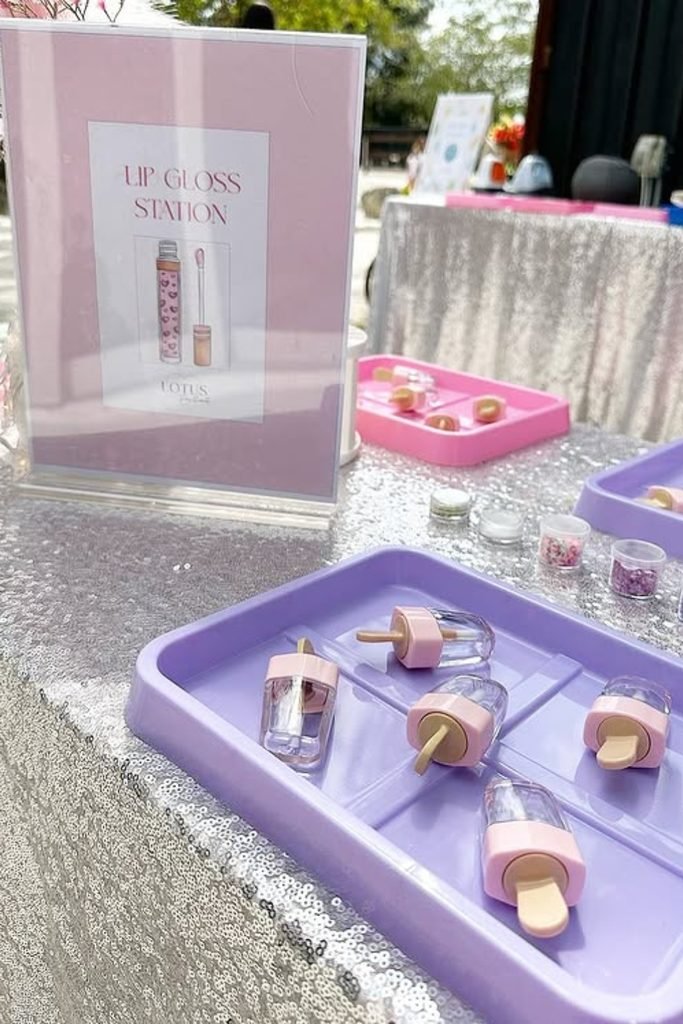
3. Gloss Station
Add a hands-on activity by setting out clear gloss containers, colorful decorations, and small mixing supplies for guests to customize themselves.
Organize each ingredient in separate trays and tiny jars, keeping the station tidy while letting everyone easily choose their favorite decorative additions.
Place a simple instruction sign beside the supplies, helping guests understand the activity quickly without needing someone to explain every individual step.
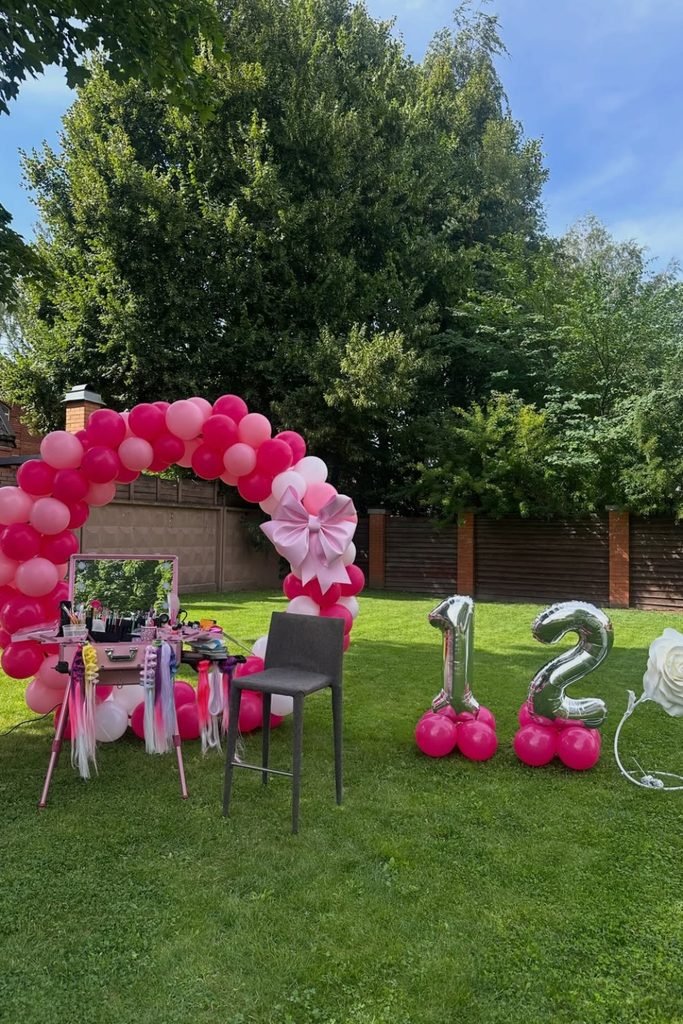
4. Glam Corner
Set up a dedicated makeover corner outdoors with a large mirror, beauty supplies, and a comfortable chair where guests can take turns.
Frame the station with pink balloon clusters and an oversized bow, creating a fun backdrop that makes the activity area easy to spot.
Add number balloons beside the setup for birthdays, while keeping brushes, ribbons, and styling essentials organized directly around the mirror and tabletop.
Wrapped With Style
Gift wrapping feels more thoughtful when you mix simple paper, ribbon, tags, and one small detail that matches the favorite-things theme.
Keep the wrapping easy to open, especially for exchanges, and skip bulky bows that get crushed before guests even choose their gifts.
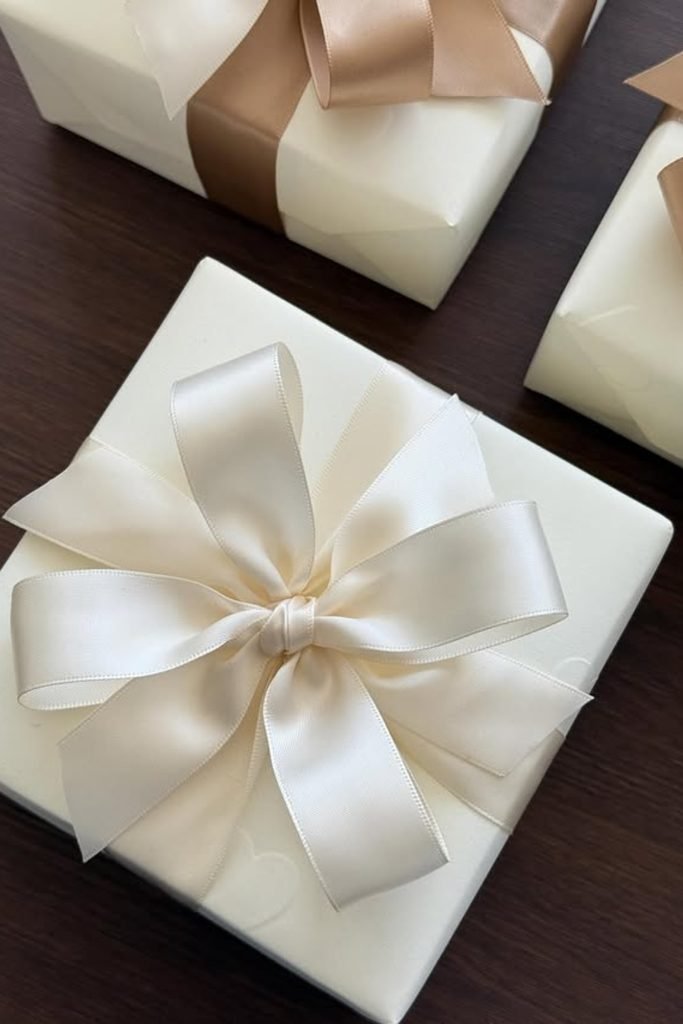
1. Satin Wrap
Keep the presentation soft and polished by wrapping each box in creamy paper, then finishing it with a wide matching satin ribbon.
Tie the ribbon into generous loops rather than a tight bow, giving even a simple square box more volume and visual interest.
Use this monochrome wrapping when your celebration has a neutral palette, since the subtle finish looks elegant without needing tags or extra decorations.
2. Evergreen Finish
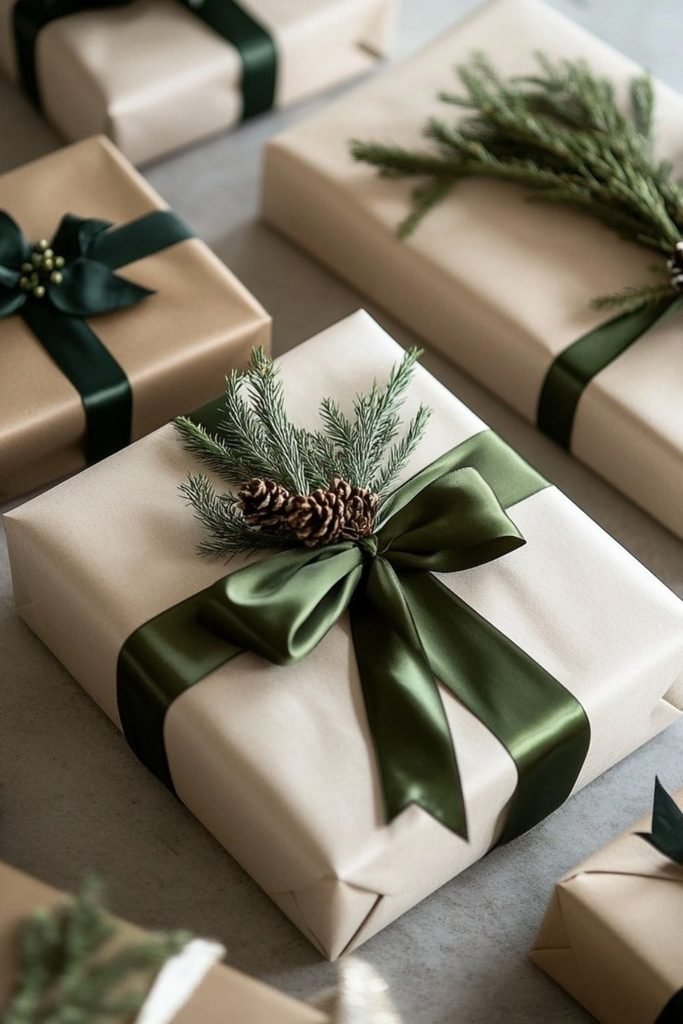
Bring a natural touch to plain wrapping by pairing warm neutral paper with deep green satin ribbon and fresh evergreen sprigs.
Tuck small pinecones beneath each bow for extra texture, keeping the greenery slightly loose so the packages still feel relaxed and organic.
Mix different shades of green ribbon across several boxes, creating gentle variation while keeping the whole gift display coordinated and seasonal.
3. Striped Packages
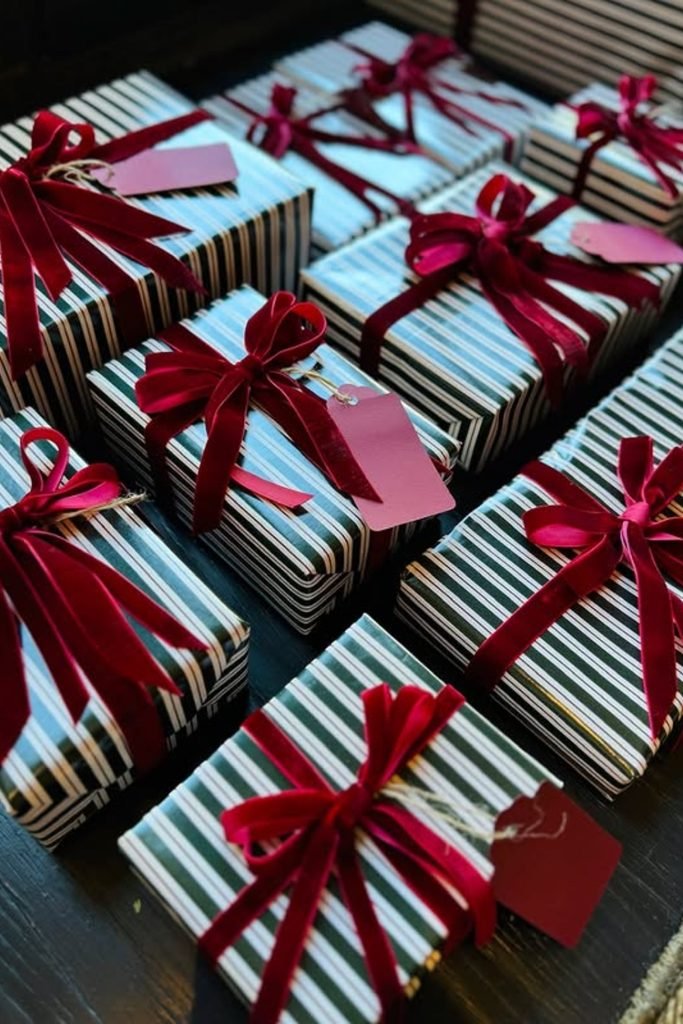
Make smaller favors stand out by choosing striped wrapping paper, then adding rich red velvet ribbon for a bold contrasting finish.
Tie each ribbon into a simple bow and attach a small coordinating tag, giving you an easy place for names or short messages.
Arrange the finished packages together near your exit or favor table, where repeating stripes and red bows create an instantly coordinated display.
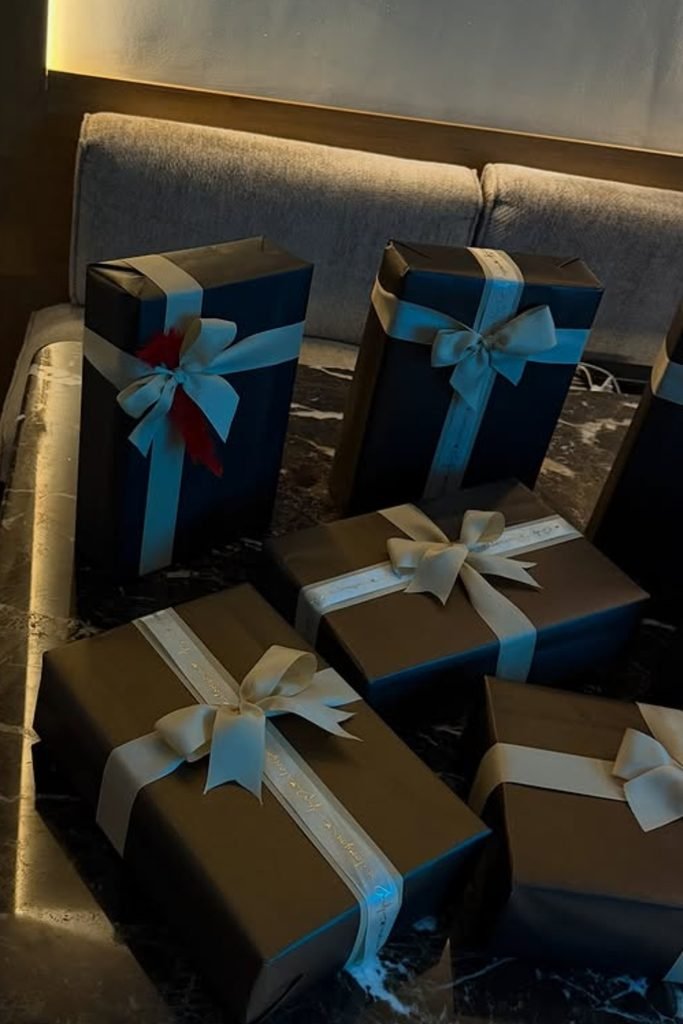
4. Dark Elegance
Choose matte black boxes when you want the gifts to feel modern, then soften their dramatic look with wide ivory or pale ribbons.
Vary the box sizes while keeping the wrapping consistent, helping multiple gifts look connected even when their shapes and proportions are different.
Place the finished boxes together on one table or bench, turning practical guest gifts into part of your celebration décor before handing them out.